How to Register
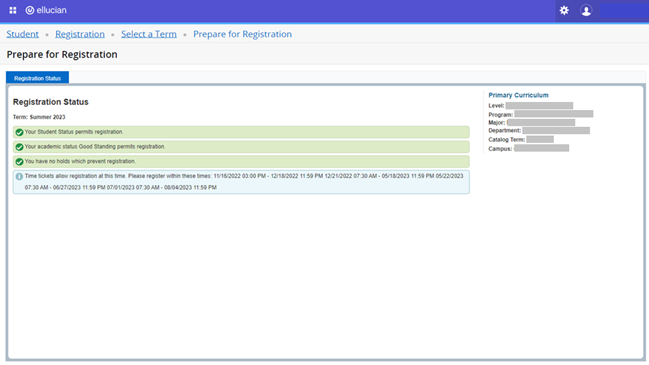
Not sure when to register? Log in to Banner and follow these steps to view your student status, academic standing, holds, and Registration Time Ticket:
- Select "Nighthawk Course Scheduler".
- Select “Prepare for Registration”.
View The New Nighthawk Course Scheduler Registration How To Video
Holds
Please be sure to check Banner for any holds. All student holds should be resolved prior to registration.
More Registration Information
-
-
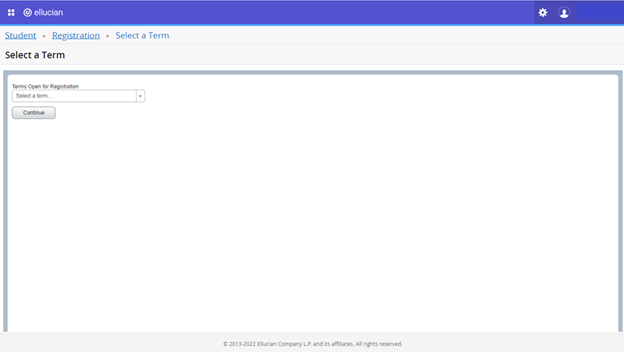
Log into Banner and select “Registration (Nighthawk Course Scheduler)”.

-
Select "Register for Classes".

-
Select the semester you want to register for and select “Continue”.
-
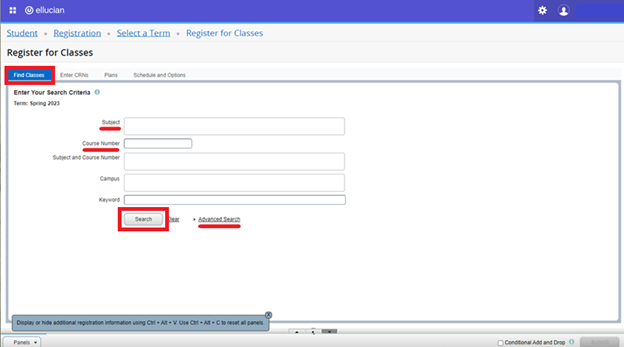
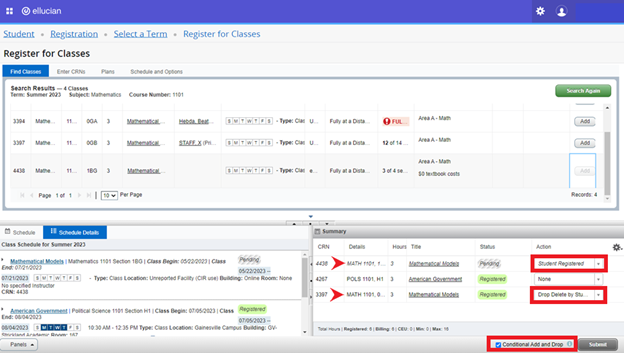
Search for classes on the “Find Classes” tab using course subject and/or number. Filter results by adding a campus or using Advanced Search options.
- In the search results, select “Add” next to a class to add it to your Summary.
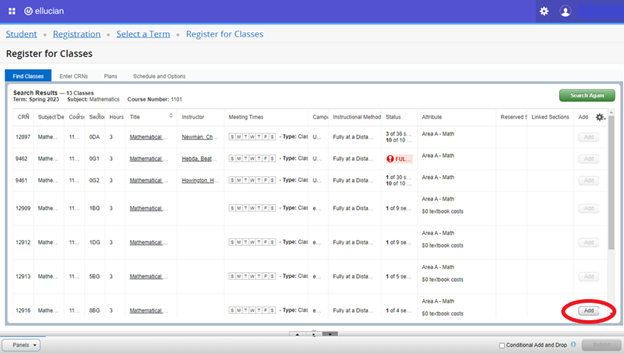
- You can also add classes to your Summary using a CRN number on the “Enter CRNs” tab.
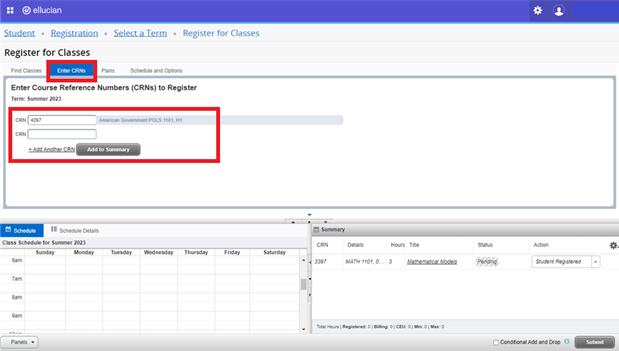
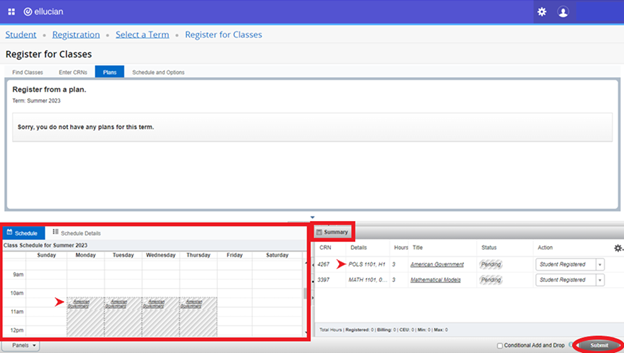
- Courses added to your Summary will appear by date and time in the “Schedule” section of the page.
- Choose the “Student Registered” action from the drop-down menu in the Summary and select “Submit” to register.
- Successfully registered courses will change from “Pending” to “Registered” in the status column of the summary.
Note: Courses are not Registered until the “Submit” button is clicked on your schedule summary.
-
-
If you need to drop classes from your schedule but have a hold on your account preventing registration changes, please email the Registrar's Office from your UNG email account for assistance.
- Log into Banner and select “Registration (Nighthawk Course Scheduler)”.
- Select “Register for Classes”.
- Choose the “Drop Delete by Student” action from the drop-down menu for each class you want dropped in the schedule summary.
- Select “Submit”.
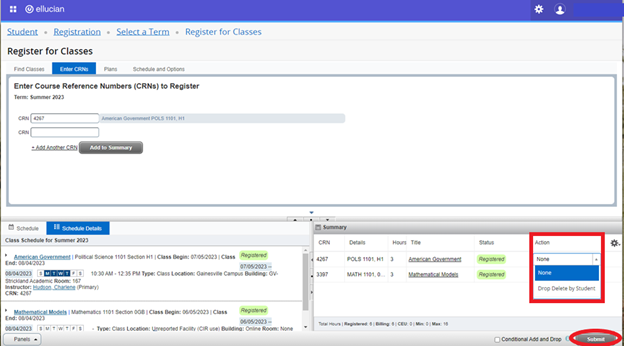
Note: Check the “Conditional Add/Drop” box when you want to drop a class from your schedule on the condition that you are able to add a new class to your schedule at the same time without error.

-
- Log into Banner and select “Registration (Nighthawk Course Scheduler)”.
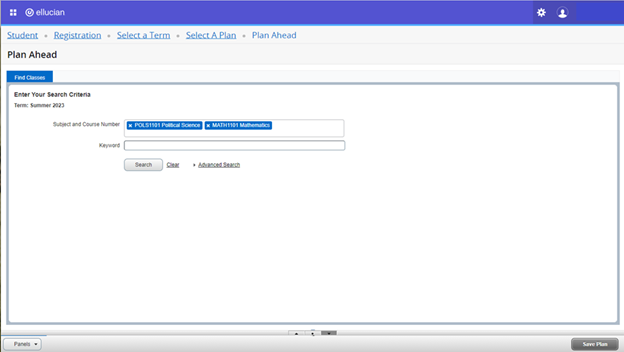
- Select the “Plan Ahead” link.
- If "Plan Ahead" is not available, go to "Prepare for Registration" first, then return to "Plan Ahead".
- Select the semester you want to plan for and select “Continue”.
- Add each desired course for the selected term to the “Subject and Course Number” box and select “Search”.
- Use the “View Sections” button to see available class sections for the selected term.
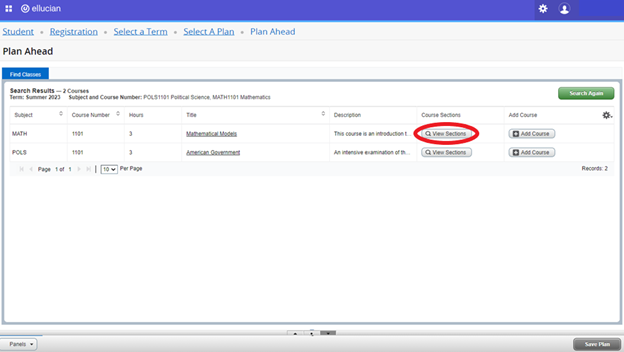
- Select “Add Course” to place a course in the plan summary. Add comments to a planned course using the note icon in the summary.

- Once all courses are added select “Save Plan”.

- Use saved plans to aid registration in the “Register for Classes” page.

-
Access the Student Tranguid to confirm the accuracy of your final schedule.
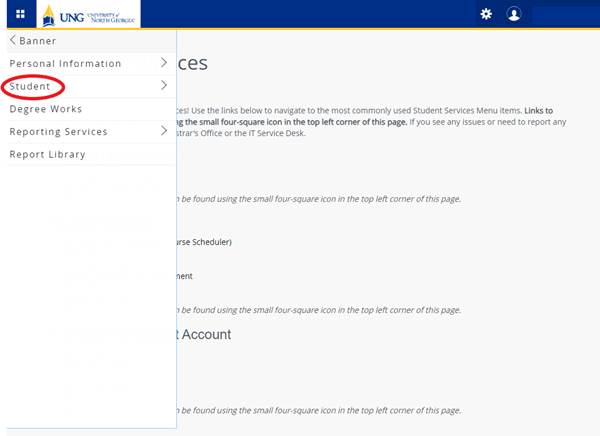
- Log into Banner and select the small four-square icon in the top left corner of the page.
- Select “Banner".

- Select "Student"
- Select "Student Records"
- Log into Banner and select the small four-square icon in the top left corner of the page.